
Business Directory supports the following payment gateways:
Installing Payment Gateways
Install the Business Directory Premium module to access the Authorize.net payment gateway. Using Business Directory Lite? Activate Authorize.net with our snippet!
Sandbox or Merchant account
Sandbox information
You will need to go to Authorize.net sandbox and sign up for a sandbox account in order to use test mode with the Authorize.net gateway. It’s recommended to use test mode if you just started your directory to make sure payments work as should before you accept real payments, then find out there’s an issue.
Merchant information
Sign up for an Authorize.net merchant account or login if you already have a merchant account. Make sure test mode is turned off when using merchant credentials.
Configuring Authorize.net Gateway
- Go to Directory → Settings → Payment
- Click on the Authorize.net sub-tab
- Click the toggle button to activate the Authorize.net gateway
- Log into your Authorize.net sandbox account for test mode or your merchant account for live payments.
- Click the Account tab from your account home page.

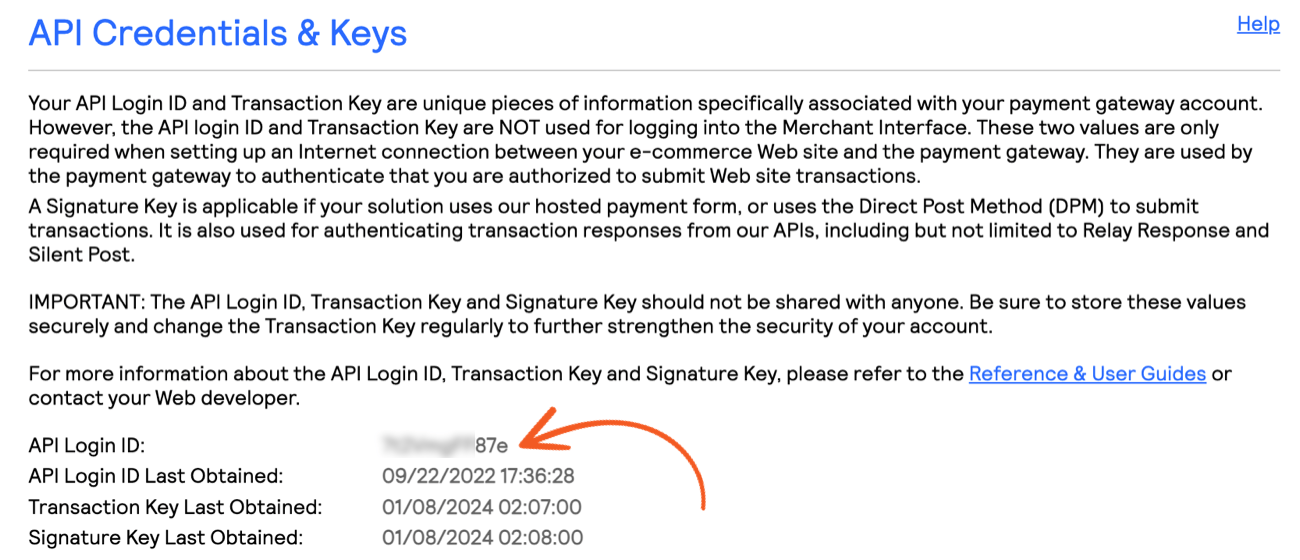
- Click API Credentials & Keys (under Security Settings).
- Copy your API Login ID and paste it into your Login ID setting.
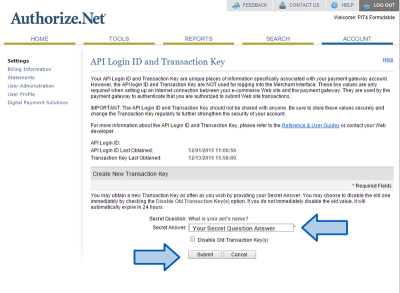
- Navigate back to your Authorize.net account API Credentials & Keys page.
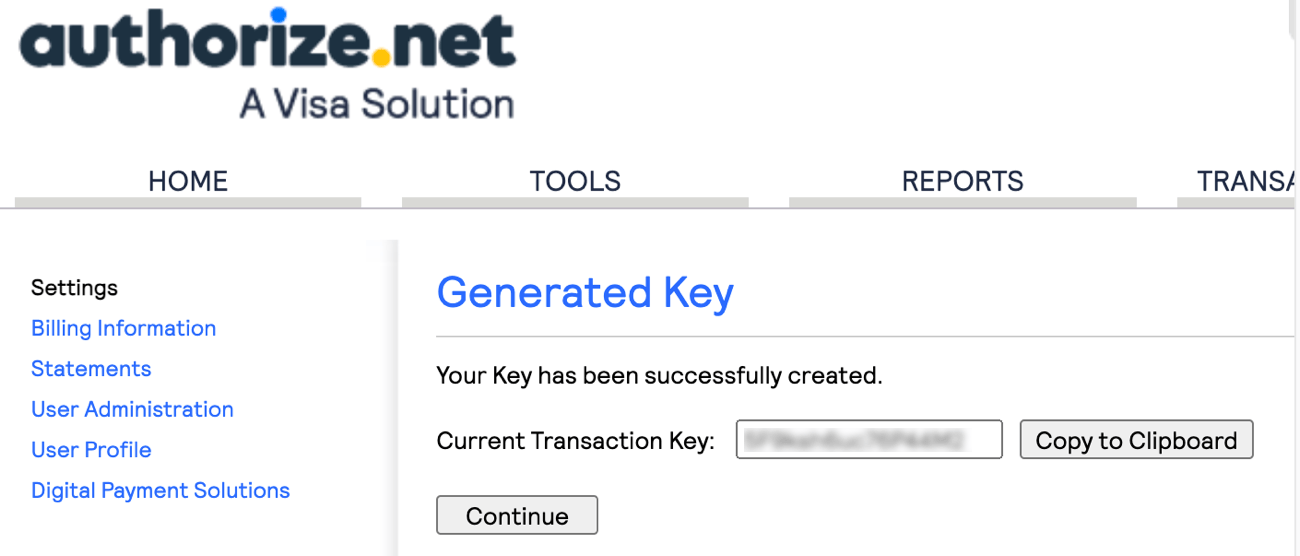
- Select New Transaction Key and Submit to get a Transaction Key.
- Copy the new Transaction Key and paste it to your Transaction Key setting.
- (Optional, but recommended) Put the payment gateways in test mode. Uncheck this when done testing!
- Change your currency, if applicable
- Change currency display options, if you want
- Turn on the abandoned cart emails, if desired
- Save settings
- Create one or more Plans
- You’re ready to test payments. Logout as Administrator and attempt to place a listing–verify that it goes through. Payments will not be taken if you are logged in as the administrator!

Once correctly configured, your payment options and Authorize.net configuration will look like this (production mode):

Your Login ID and Transaction Key should be different, of course. The remaining settings including currency code and currency code placement are left up to you, depending on your preferences and needs. You can configure these under Directory → Settings → Payment → General Settings here:

You can also configure payment reminders for those who attempted to place a listing, but never complete the process (“Abandoned Cart Emails”):

And lastly, if you have the Discount Codes module installed, you can activate whether to allow discounts for listing purchases here as well.
Now you should be ready to receive payments via Authorize.net!
