
Great support and poweful plugin.


Last updated on June 24, 2025 by Business Directory Team
How to Create a Business Directory in WordPress
Wondering how to create a business directory in WordPress? With Business Directory, you can turn any website into a directory that gets visitors.

Most people think of directory websites as a thing of the past.
Business Directory is the best WordPress directory plugin. Get it for free!
Small business directories are still popular. And for good reason. Visitors quickly find the businesses in their area in seconds with a quick Google search. Restaurants, clothing shops, auto services, and many industries benefit from directories.
Now, usually, creating a great business directory means hiring a web designer. But what if there was a plugin that could do everything a web designer does and more?
Well, there is! And it’s called Business Directory Plugin (how fitting, right?).
This post will show you how to build the directory website you want, all in a few easy steps with Business Directory.
So, let’s get started.
What is a WordPress business directory?
A WordPress business directory is a simple collection of listings so visitors can easily find what they’re searching for.
For example, you can create a business directory of local businesses where users can leave ratings and reviews. You can also include maps so visitors can easily find the business location. As you can see, it works very similar to Yellow Pages, only better!

So, you’re wondering how to build a simple business directory website.
There are two easy ways: a WordPress plugin or theme.
If you want to use a WordPress business directory theme, we suggest using BD’s sister plugin, Formidable Forms. Its features and ease of use make it a perfect solution for your WordPress theme and website.
But, for our post today, we’re going to focus on using a plugin. And that’s Business Directory.
How do I create a business website directory?
The first thing to do is install and activate the Business Directory plugin.
To do this, go to your WordPress admin, go to Plugins → Add New, and search for Business Directory. You can also download the Business Directory plugin here.
Now, it’s 6 simple steps to get your business directory up and running:
- Create your directory listing page
- Adjust your settings
- Modify your form fields
- Create categories
- Test your form and add listings
- Link to your directory page
? Did you know?
You can also create a directory for free! Get started on creating your free directory today!
Step 1: Create your directory listing page
When you activate the plugin, Business Directory asks if you want it to create your required pages. So, choose this option to make it easier on yourself.

The other option is to create the page yourself, then add a piece of shortcode.
To do this, go to your WordPress dashboard and choose Pages → Add New. In the page editor, you can add the [businessdirectory]. This shortcode works for now, but you can adjust this later if you want.

So, now that pages are set and ready to go, let’s dive into the settings.
Step 2: Adjust your settings
Now, go to Directory → Settings in your WordPress dashboard.

This is the main dashboard of your directory. You can configure settings like:
- Requiring visitors to register before submitting
- Enabling reCAPTCHA for spam
- Choosing payment settings
- Setting up listings and categories
Step 3: Modify your form fields
Business Directory comes with predefined form fields, but you can customize them or add new ones if you’d like.
To do this, go to Directory → Form Fields.

Once your form fields are set to how you want, advance to the next step.
Step 4: Create categories
You must attach a Category to link listings on your directory page properly.
To add and customize your categories, go to Directory → Categories.

These categories help users navigate your site and also provide structure to your website, which helps with Search Engine Optimization (SEO).
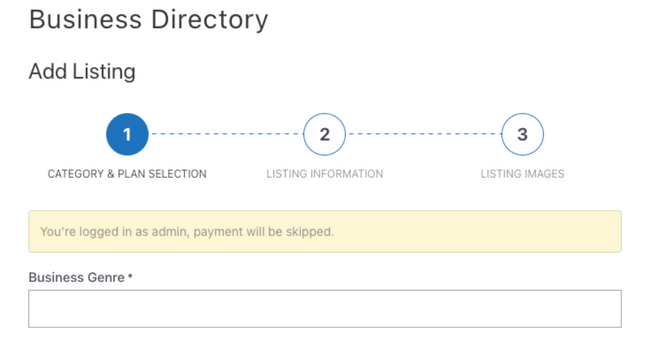
Step 5: Test your form and add listings
Next, navigate to the business directory page you set up in step one.
Here, you can simply click Add Listing to test out the submission form. Or you can go to Directory → Listings and click Add New Listings.
If you have many listings, you can add them in bulk using the CSV import feature.
But, to test it out, submit listings to ensure it’s working.
Step 6: Publish your directory page
And you’re all set. The only thing you need to do now is to publish the page you created in step one.
You can also do that now if you have any additional listings to add before.
If you’re ready to go, though, you can start directing website visitors to your page!
Easily create directories with Business Directory

If you couldn’t tell already, Business Directory is the best WordPress directory plugin on the market.
With its simple drag-and-drop builder, creating a directory website using WordPress only takes a couple of minutes. And that means faster results for you.
For example, imagine you want to make money with a WordPress business directory. You plan to feature paid listings and have ads to get passive income. The only thing stopping you is getting your site up and running!
Using BD means you’re generating income faster with a simple listing plugin.
But that’s not the only reason BD is perfect for your directory site. Here are a few more features you’ll find helpful:
- Pre-built templates
- Mobile-friendly listings
- SEO-ready software
- Free and paid listings
- Custom fields
So, no matter your goal with your directory website, Business Directory is here to help. And you get even more with Business Directory pro!
Let your team shine with a team members page
Your team members are the heart and soul of your business.
So, repay them with a little bit of the spotlight. And the best way to do that is meet the team page in WordPress.

Here, you can list their position, what department they work in, and their accomplishments, and give them a shining description to show how amazing they are. You can even let them write it to make it more personal!
Either way, it’s easy to do with Business Directory and saves you tons of time.
Boost your real estate business WordPress website
Become the realtor you always dreamed of with Business Directory.
You can easily create a real estate website to watch your business soar!

Create your realtor profile, display the latest listings, and accept leads through the form to boost your sales. And BD works perfectly with Google Maps so that you can pin the house’s location for easy viewing.
Business Directory is a multi-use tool that keeps on giving.
Offer the best restaurant listings
One of the first things people do when they arrive in a city is look up the best restaurants.
And your website can be there waiting for them. All you have to do is build it.

That’s easy with BD. We offer a template for restaurant listings!
So you just kick back and relax and enjoy the traffic to your site.
And it doesn’t only have to be used for restaurants. You can create any website with this theme!
Wrapping up
It’s that simple to build a business directory in WordPress.
But who would have expected less from a plugin with the name Business Directory?
This post taught you how to simply create an online business directory and have it up and running today. And we hope it helped out! Be sure to leave a comment if you enjoyed the post or if you have any questions!
So, what are you waiting for? Get Business Directory Plugin now and launch your fantastic directory site today!
This article may contain affiliate links. Once in a while, we earn commissions from those links. But we only recommend products we like, with or without commissions.