
Great support and poweful plugin.


Last updated on April 22, 2026 by Business Directory Team
How to Create a WordPress Blog Directory [The Easy Way!]
Looking for an easy way to build a WordPress blog directory? This step-by-step tutorial helps you start and finish one today with one simple plugin!

Blog directories are perfect for bloggers and directory owners.
You see, it’s much more than just a listing site. A blog directory is great for search engines, blogs, and readers!
So, if you’re ready to get started with your blog directory, let’s get started!
Why create a blog directory?
Besides being an authentic traffic source for blogs, a blog directory is important for its owner as well.
Here are some reasons why you would want to run a WordPress blog directory.
- You help new bloggers get exposure to readers.
- Accept paid listings and make money from the site.
- Offer different features in different directory pricing options.
- Display ads on the site and monetize your directory traffic.
- Provide content marketing services.
So, not only do you help people grow their blogs, but you make some extra cash on the side!
Business Directory is the best WordPress directory plugin. Get it for free!
And if that sounds good to you, we’ve got the perfect WordPress plugin to get you started: Business Directory Plugin (BD).
But don’t be fooled by the “business” part, BD is great for any type of web directory!
Not sure? Let’s show you what we mean with a great step-by-step tutorial.
How to make a WordPress blog directory
To start, you must have a WordPress website and Business Directory Plugin.
You can get a fresh WordPress site from our recommended WordPress hosting companies. A web host is needed for any website.
Once you’re ready with these tools, follow the steps below.
Step 1: Install and activate Business Directory Plugin
Log in to your WordPress admin dashboard and install Business Directory Plugin.
You can use the free version of BD to get started. But the premium version gives you even more to make your blog directory one of the best.
Installation is easy. But if you’re a newbie in the world of WordPress, follow the detailed installation instructions in our documentation.
Step 2: Create the necessary WordPress blog directory pages
Luckily, BD makes the first part easy for you!
When you install and activate the plugin, BD asks you if you’d like to create the required pages for you.

So, to make things easy, click the Create required pages for me button.
Now the first part is done! That page is your main listing archive.
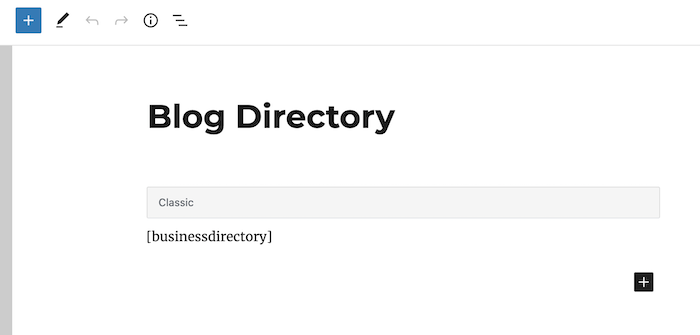
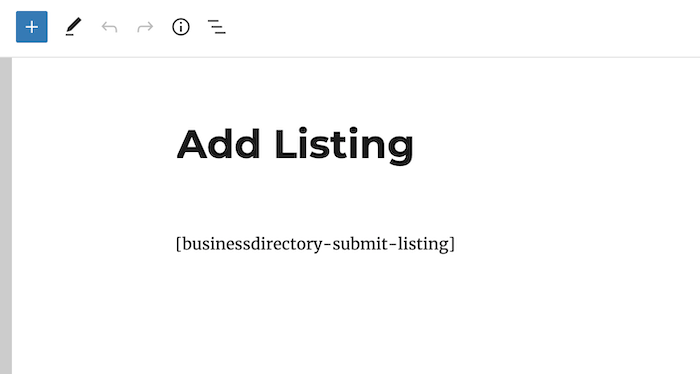
Next, you need to create another page for an “add listing” page.
This will be a front-end form. You and your visitors can add or submit blog listing items using this form.
To create this, add a new page and put the [businessdirectory-submit-listing] shortcode in the content box.
Then make sure both pages are published.
The main listing archive page can be set as the home page of your blog directory.
And, you can link the listing submission page from your menu bar or wherever you want.
Step 3: Get customized form fields
Form fields are an important part of the Business Directory Plugin.
It collects listing information via these fields. The plugin has a few form fields built in.
You can edit, add, or delete form fields from WordPress Dashboard → Directory → Form Fields.
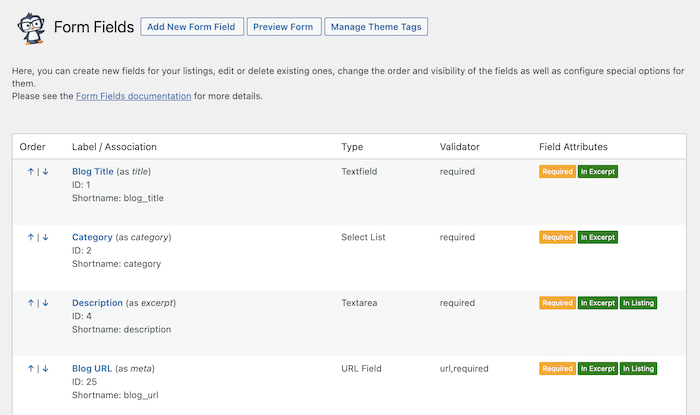
So, let’s edit our existing form fields to get the following fields.
- Blog Title
- Description
- Blog URL
- Age of the Blog
On a form field’s settings page, decide whether this should be displayed on the excerpt view or detailed view. Or, you can show a field on both views.
Step 4: Add WordPress blog directory categories
When you write a blog post, you assign it to a category, right? It’s an easy way to keep blog posts organized.
Business Directory Plugin does the same with its listing items. It has a special category system called Directory Category. Each directory item belongs to a category.
As a manager of the WordPress blog directory, add some directory categories to keep the blog listing items organized.
To get started, go to Directory → Directory Categories in your WP admin.

Business Directory Plugin also has the Enhanced Categories module to power up your categories.
It adds features like category hierarchy, custom category presentation, category thumbnails, etc.
You can use this module to enrich your blog directory.
Step 5: Configure the directory system
At this point, we want to set up the directory system.
You can customize this in the Business Directory Plugin settings.
For a public blog directory, you don’t need to do a lot of work on this.
You can access the directory system settings from Directory → Settings. Most of the default options will work for a public directory like the one in our tutorial.

You can explore and tweak the options as you like to fit your needs.
If you want to accept paid listings, we need to add pricing plans and a payment method to the directory.
Like any other service, your paid listings should have a pricing plan. While adding a blog listing item to your directory, a visitor will see these pricing options and choose one.

To set this up, go to Directory → Plans to create and manage pricing plans.
A free plan is built-in, but you can customize your own to fit your pricing structure. If you want more info, check out our plan documentation.
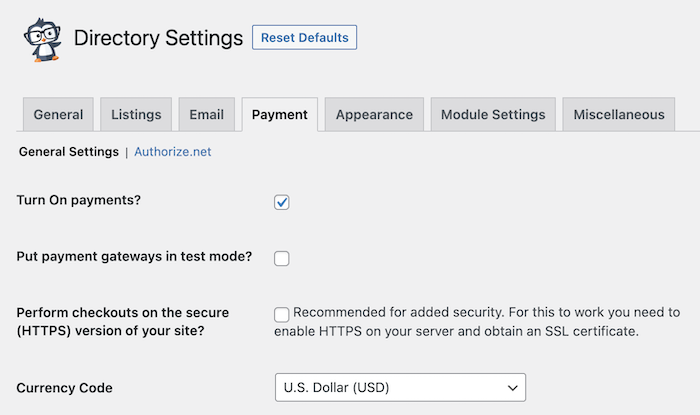
Business Directory Plugin offers Authorize.net support by default.
If you want to use that, you can add your Authorize.net account right away. Or, you can also add PayPal, Stripe, and more using our premium modules.
To set up your payment gateway, go to Directory → Settings → Payment.
If you need some help, please see the payment docs.
Step 6: Style your directory with a dedicated template
There are several exclusive directory templates to make your directory site beautiful.
You can check out our theme collection and get one for your blog directory. These templates can be used on any type of listing site. For this tutorial, we’ll choose the Restaurant theme.
To install a theme, go to Directory → Themes.

After the installation, activate the WordPress theme to see it in action.
Need some assistance with themes? We’ve got detailed documentation for that, too!
Step 7: Add blog directory items
Now that we’ve prepared our WordPress blog directory, it’s time to add listing items.
Go to the listing submission page to create directory items.
Remember the Add Listing page from the 2nd step? Open the form and add sample blog listings.

Just provide the blog site information and publish the listing item.
Your visitors can also submit listings using this page. All of their submissions will be saved as pending by default.
Check out listing settings to get more control over your directory structure and how the blogs are shown.
Step 8: View your WordPress blog directory
Well done! You’ve successfully created your WordPress blog edirectory.
Here’s an example screenshot of the directory front page.

Next, take a look at the blog directory archive view.
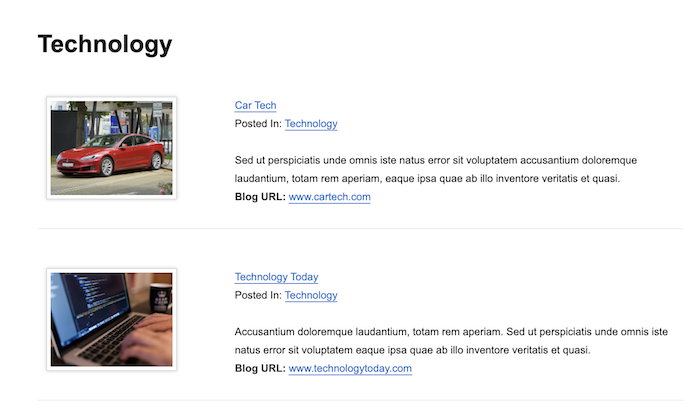
And this is a single blog directory item detail page.

Pretty easy, right? Now your blog directory is ready to go and it’s time to start earning some cash!
But, don’t stop here. If you want to create other directories (like real estate or business), BD can help you with that, too!
Ready to create your WordPress blog directory?
We hope you’re excited!
Starting a new website is always full of so much potential, and your blog directory is just the start!
So, don’t wait any longer. Grab Business Directory Plugin and get started today!
Get Business Directory Plugin premium with a 14-day money-back guarantee! Your investment is well protected. Start your WordPress blog directory with confidence.
More posts about WordPress directories
 How to Build a Directory Website with WordPress [5 Steps!]
 The Ultimate Restaurant Directory Website WordPress Plugin
 How to Create a Business Directory in WordPress
This article may contain affiliate links. Once in a while, we earn commissions from those links. But we only recommend products we like, with or without commissions.